
Formatting features are the built-in features of Microsoft Word and other similar applications that we use to make a document presentable. To use formatting in Word, you simply need to select the text you wish to format, go to the correct toolbar, and select any of the functions. Example Bold, Italics, Underline. In most cases, employers may ask you to prepare a document for them. One example of this would be a list of items that need to be restocked. In so doing, you need to format your document to make it as presentable as possible. In this article, we will be talking about formatting features, how, and why we use them. Keep reading to learn:

- What is highlight and how to use it in a document;
- Changing case;
- How to use wrap text to make your image and text work better together;
- Setting page size;
- Set your page margin; and
- Working with page and section breaks.
What is highlight and how to use it
When using paper-based documents, a highlight is where you use a fluorescent marker to identify important text. We are able to do this on the computer, too. Highlight is a function in word processing software used to draw attention to specific text or information, making it stand out from the rest of the Document.
How to highlight in Microsoft Word 365.
To apply highlights in Microsoft Word, select the text you want to highlight, then go to the area labeled Font on the home toolbar. To the rightmost section, you will see what looks like a marker with a line of color beneath it. This is your highlighter tool. Click on the text highlight color and choose whichever color you wish to use as your highlighter. That’s it. You have just highlighted a piece of text.
Changing lowercase to uppercase
Uppercase, otherwise known as uppercase text, is often used for headings and titles.
To change your text to uppercase, you need to first select the text. Next, go to the home toolbar and click on the icon that has Aa. Click on the icon. In the drop-down menu, choose UPPERCASE. This changes your test from another case to uppercase. For example, font becomes FONT.
What is Word Warp | How to apply this formatting feature
We use wrap Text to prevent our text from overflowing or extending beyond the page margins.
This function is usually enabled by default in Microsoft Word This is why your text does not usually overflow the page area. However, when you work with images, the Wrap Text option allows you to decide how your text and the image fit together visually. So start by having some text on your page and follow up by adding a picture to your document.
Adding a picture
For our illustration, we will add a picture from your device. To add a picture stored on your computer to your document, follow these steps:
- Click in the area where you wish to see the image.
- Go to the illustrations section of the Insert toolbar.
- Click the option labeled Pictures. This will cause a dropdown menu to appear.
- From there, you need to choose this device. Here a popup window will appear.
- Choose the picture folder since this is where images are stored by default. However, if you have your image stored in a different folder, you will need to go there.
- Next, double-click on the image that you wish to use.
That’s it! You should now have a picture on the page.
Performing wrap text with the picture
To perform the wrap text with the image, follow these steps:
- Select the image by clicking on it;
- This will cause the Picture Format toolbar to appear;
- Click on the Picture Format toolbar;
- In the arrange section to the right, click the Wrap Text option;
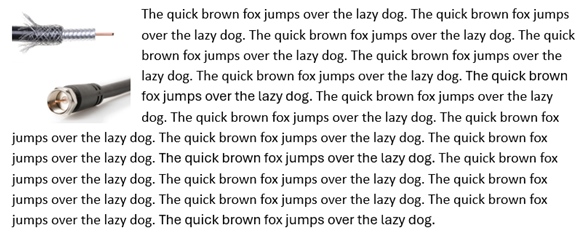
- For our illustration, we will let the text flow around the picture. So in the drop-down menu, click square.
- That’s it! You should now see the text flowing around the picture, as in the picture on the right.
Setting the Page Size
This refers to the dimensions of the paper or digital canvas on which your document is formatted. By default, in Microsoft Word, your page size is set as Letter, which is 8.5″ × 11″. To change this, follow these steps:
- Go to the Layout toolbar.
- In the page setup section, click size.
- Select the page size you wish to switch to in the dropdown menu.
Even though you may not be able to observe the change, you have just set the new size for your page.
How to set page margins
Margins are lines that are placed at the sides of your pages to make your Word document visually appealing and ensure that content doesn’t get cut off during printing or viewing.
To set your margin:
- Go to the Layout toolbar and click on the margin option.
- In the dropdown menu, choose the option that best suits your needs.
Note: If you do not see an option that suits your needs, go to the custom margin option to enter the width of your margins.
Set your page break
We use page break to insert a new page into the document to ensure that there is a clear separation between different parts of the content.
To set a page break, go to the Insert toolbar. In the Pages section, select Page Break. This will automatically insert a new page and maintain the separation of certain parts of your content.
What does this mean? Let’s say you have a page with the introduction of your document, and you wish to ensure Chapter 1 is on a new page. By clicking Page Break, you will insert a new page to begin typing your first chapter. Now even if you go back later and work on your introduction, and it increases to two pages instead of one, the page break ensures that Chapter 1 remains on its own page at all times.
Setting section break
Section break is an extension of the page break option. We use it to divide one part of a document from another. This may be within the same page or in the form of a section break.
In Microsoft Word 365, go to the Layout toolbar to set the break. Next, go to the Page Setup section. Let’s assume you have a page of text and you would like to have a part of the text set on another page or in a new column. Go to the place in the text where you would like to make the separation. Next, click Break and choose the type of break you wish to use in your document.
Word processing software comes with a multitude of formatting features that are great for displaying your business document in a professional and appealing way. It also has many features that can be used to edit your document efficiently. Visit our other articles on Microsoft Word 365 to learn more.